Chat Interface
With Twixor Chat Module, you can talk with your consumers from any place. Start chatting with your clients by using the chat interface and change them into your promoter.
It won't let you worry about any jumble and allows you to concentrate only on customers and conversations. Twixor's chat functionality aids you to solve cases better.
The interface is designed in such a way that it allows you to chat with several customers even if you are busy with other activities. Your work can be made easier using Artificial Intelligence- powered with actionable click buttons for conversational messaging.
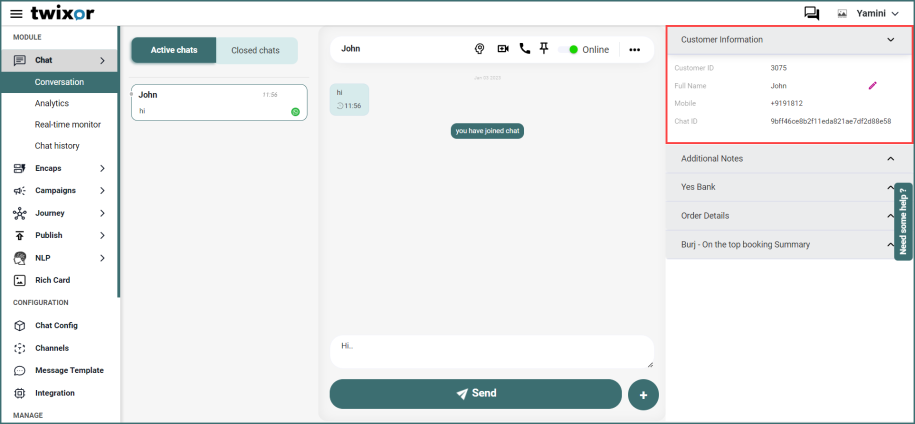
Below shown is the chat interface of Twixor Chat Module.
Use the Chat interface through these steps:
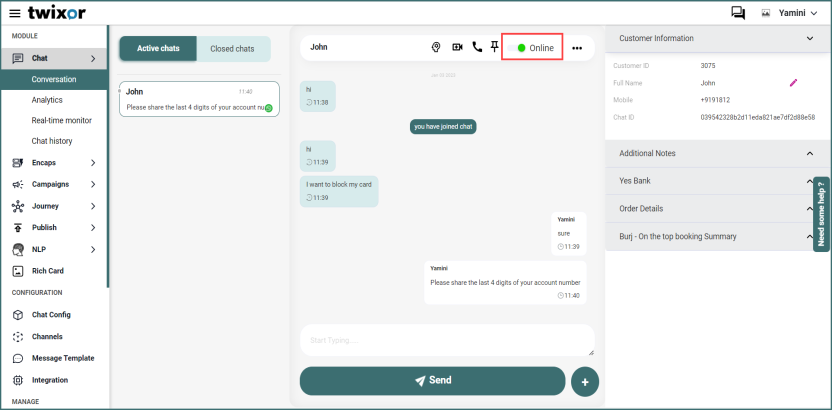
1. Navigate to Chats -> Conversation.
2. Enable Toggle button (Online) to accept chats or disable it, (Offline) if you don't want to receive chats.
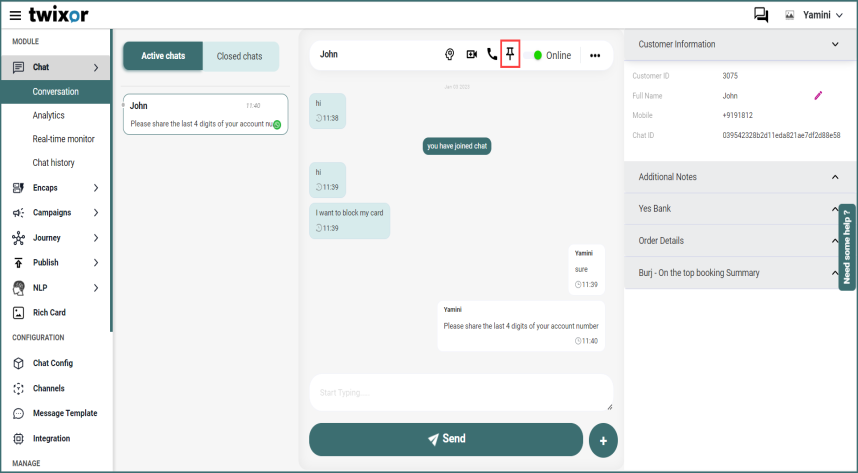
3. If the agent has picked up multiple chats and they can pin the ongoing chats to aware that he/she must return to the specific chat at some point. Agents can pin the unfinished chats by clicking pin icon so the pinned chats always remain at the top of the Chats screen, making it easier to keep track of important chats and prevent them from being mixed up and diluted with all other chats. Once the chat conversation ends you can unpin the chat again.
4.
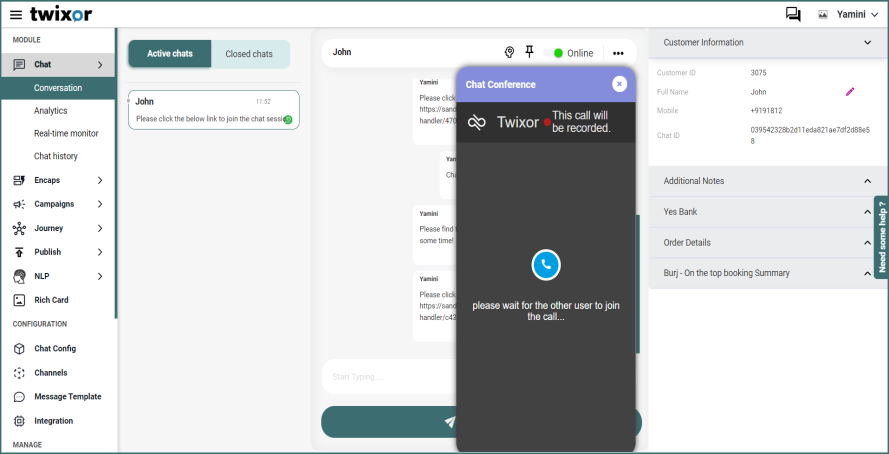
5. Click Video/Audio option to promote text chat to audio/video chat. Once an agent initiates a video or audio chat user will receive the link in WhatsApp. Users can click on the link to initiate the call. And, the recordings are available in audio/video history.
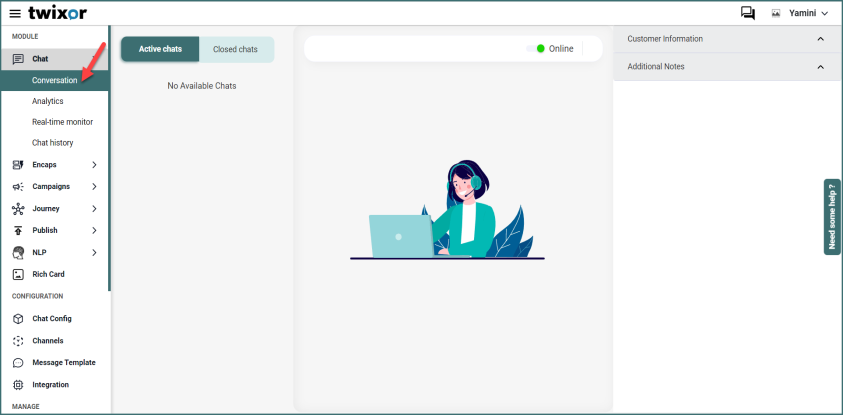
6. The customer's conversations will be available in the left pane of the Chat Interface.
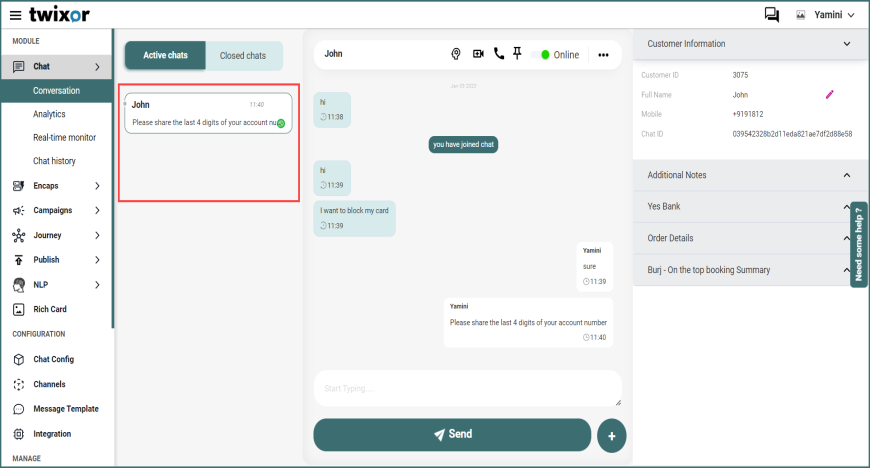
Info! When there are no active conversations, the section would display as "No Available Chats" message.
6. In the left section of this interface, click on the respective chat to respond to the corresponding conversation. Then enter the response in Start Typing in the middle section and click Send.
7. A WhatsApp user can reply to a specific message during a live agent conversation. The user responded to a certain message can be viewed in live agent’s chat conversation page and this is only supported for Karix RCM and Twixor MCMI Channels.
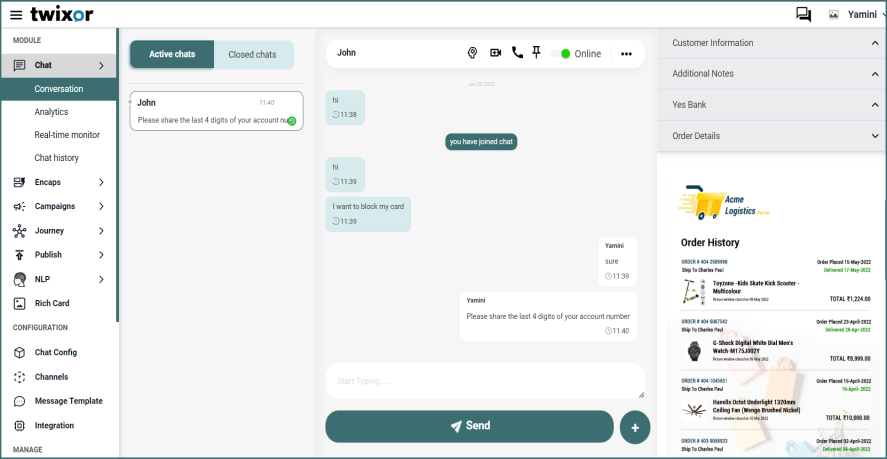
8. In the right panel of the interface, Customer information (Customer ID, Full Name, Mobile number and Chat ID), Invoice details, Order Details and Rich card details will be displayed.
Info! Invoice Details, Order Details and Rich card are configured in Departments -> Contextual Help page.
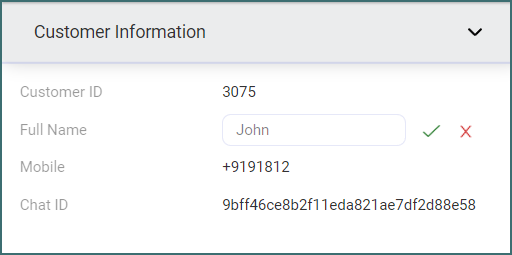
9. FULL NAME field in "Customer Information" would reflect the WhatsApp number of the customer through which he/she has initiated the chat. Once the agent picked up the chat, we can edit this field and update with the name of the customer.
10. The customer’s name will be shown based on the mobile number. When the existing customer visits again with the same mobile number, the updated customer name will be displayed.
To do, click pen icon in Full Name to change the customer’s name and click to save the changes edited.
Once the chat was closed, the existing name of the customer will be displayed in Chat history page.
Name field displays the profile name of the customer who initiated the chat. (It is available only for Karix RCM channel).
Above Customer Information, WhatsApp Business number will be visible to the agent to enhance the agents' understanding of the customer's chat location, enabling agents to identify the origin of the chat.
In Additional notes, select the tag name or marker for the customer in Tags and type the description in Notes. In the example given above, if the customer is a potential client, the agent handling the chat can tag this customer as "Prospective Customer" so that the other agents can view the important details of the customer when they chat with them in future. A detailed description of the tag can be provided in Notes. Click Update to save the data.
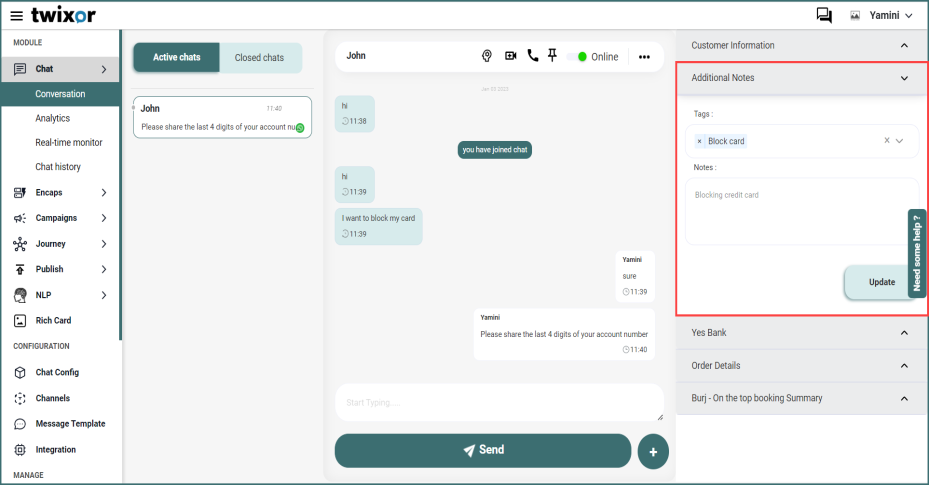
Info! Tags should be defined in Manage -> Departments to display in chat conversation page. Also, enable Tags Required check box in Configuration -> Chat Config page to make the tags mandatory (in Additional notes) while closing the chat. The Tag name given here can be used to search the customer in Chat History.
Info! The Tag name given here can be used to search the customer in Chat History
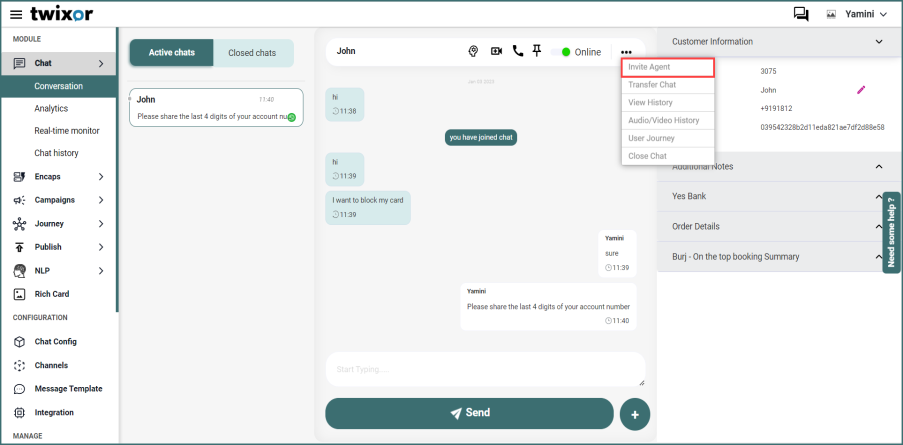
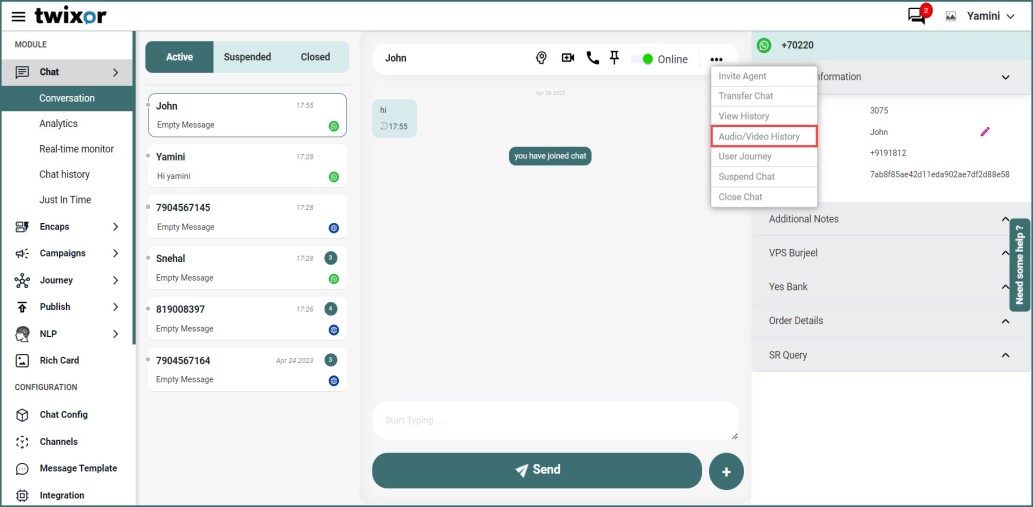
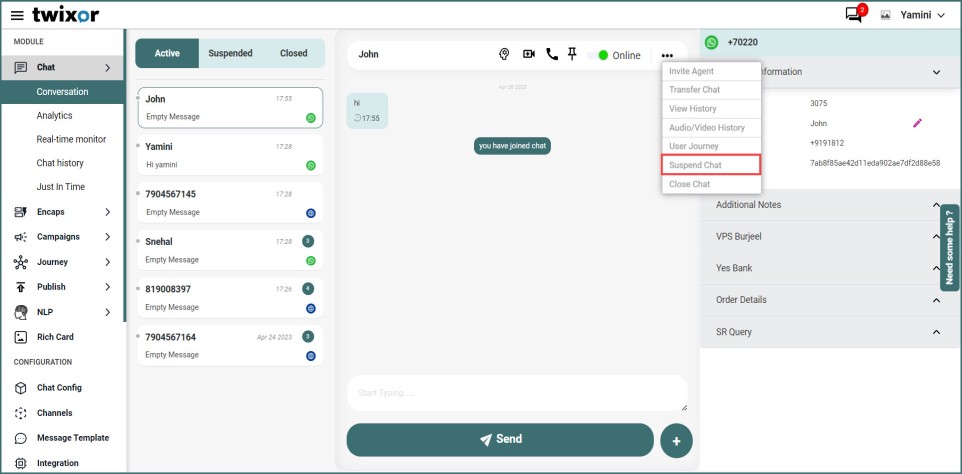
11. Click  option next to Online or Offline status to view additional chat provisions.
-
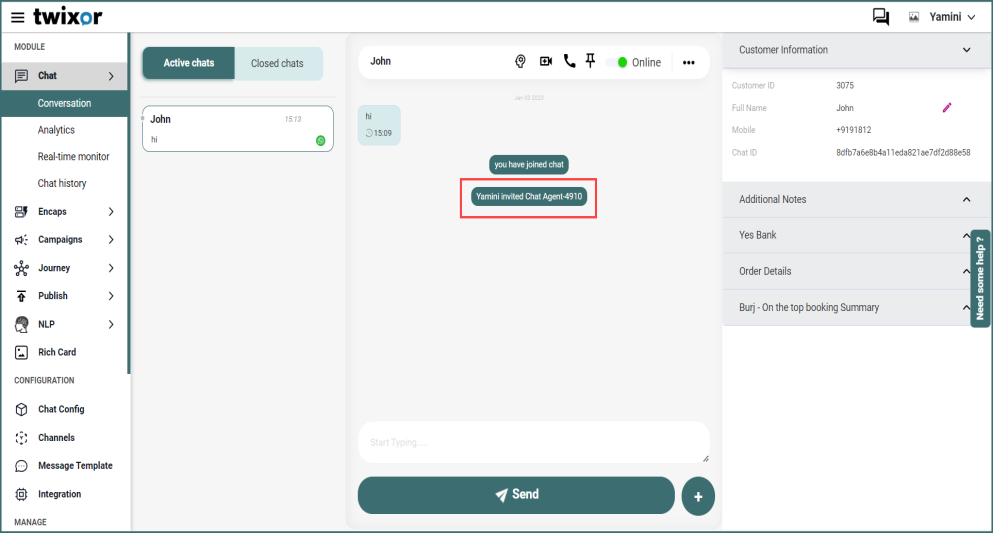
Select Invite Agent to express the interest to invite a specific agent to join the conversation. This would happen, when the chat agent primarily involved in a chat, wants more information to provide to a customer. Instead of getting in touch with that agent offline and passing on the information, a good way is to pull that agent to be part of the chat and make him interact with the customer to provide relevant information.
- The invited agent would only can converse with the customer and they have no access for closing the chat, transferring it etc.,
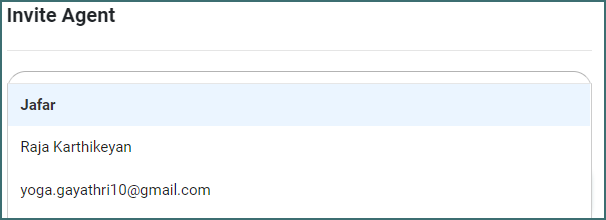
- Click Invite agent option under and select an agent name from the drop-down list.
- Click Invite Agent to invite them to join the active chat. In this example, we've invited the agent Chat Agent-4910. You will view a message "You (Your name) invited (Chat Agent Name)" in the interface as shown below.
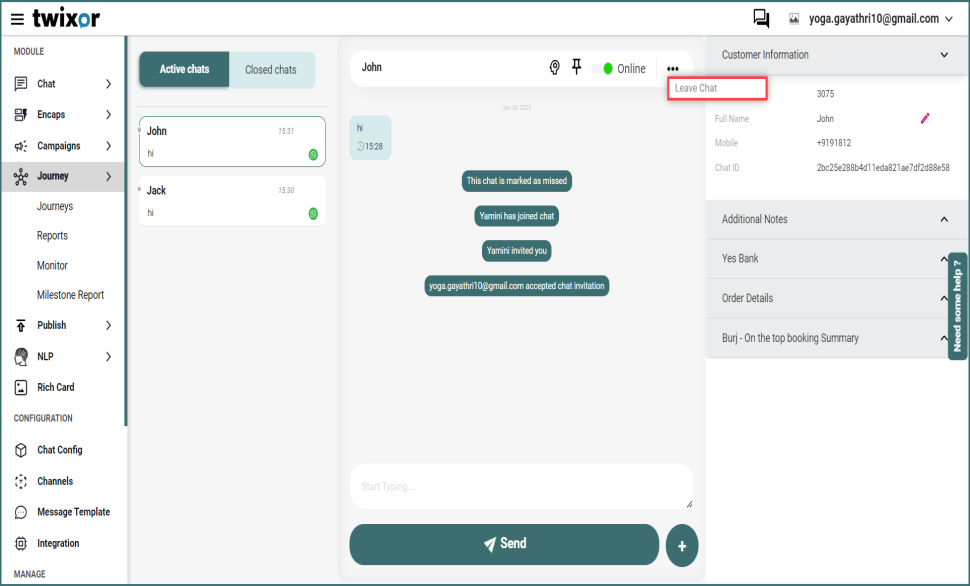
- If the agent has accepted the invitation, they can leave the chat anytime by clicking
 and selecting the Leave Chat option.
Info! The agent whom we are going to invite, should be logged into Twixor and be ONLINE. Only then the user’s name will be available in the dropdown.
- The Transfer Agent option transfers the conversation to another agent or department if he/she doesn't belong to the concerned department or not able to resolve the query asked by that particular customer.
Info! Only users/agents with chat permissions defined will be available for chat transfer.
![]()
- Click either Agent or Department option from Transfer To drop-down list to transfer the chat to the Agent or Department, respectively.
- Select the Agent or the Department name in the below drop-down.
- Agent - lists all the chat agents who have logged in and are online
- Department - lists all the departments, any chat agent who is online and logged in from the department will be able to pick up the chat
- Once chat is transferred, chat control goes away from the agent who has transferred it
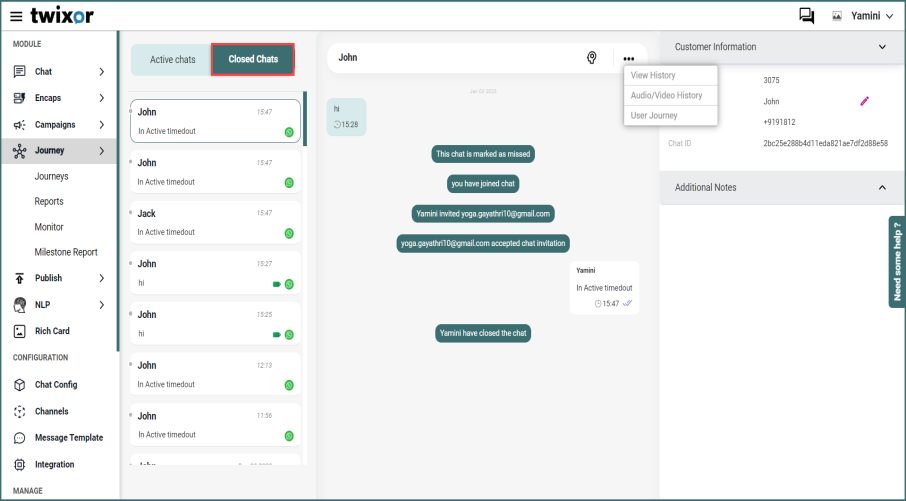
- Click View History to view the chat history of the customer. You can view the entire chat history of the particular customer with start date, end date, and agent name.
- Click Audio/Video History to view the audio/video history of the customer.
- Click User Journey to see the customer chat from the beginning. You can view the entire chat history of the particular customer with start date, end date, and agent name.
-
An agent can suspend a specific chat if it is becoming too late for him to respond when he/she is being out or away from the computer for a short time. So, the agent can resume the suspended chat when they are ready.
Click on “Suspend Chat” - You will not be able to reply to the user until you click “Resume Chat” option.
The chat will be moved to Suspended Chats tab. Once an agent ready, they can resume the chat by clicking Resume Chat, and the chat will become the active chat.
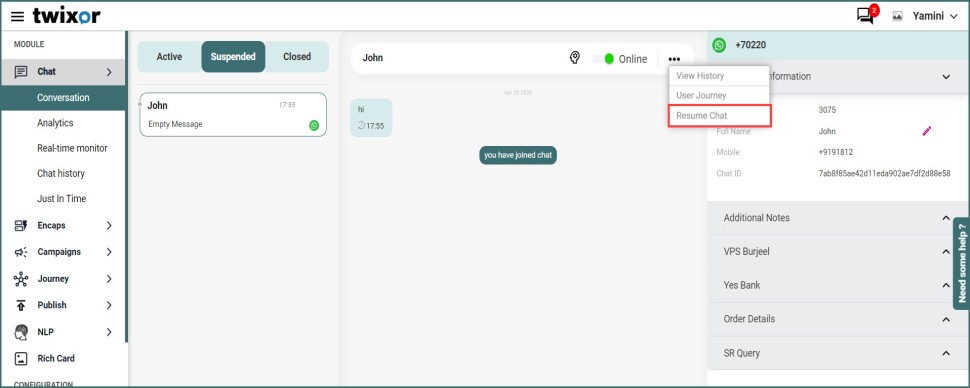
Info! There is no limit to the number of chats that agents can suspend.
The chat will be suspended until the agent resumes it; there is no time limit, and the suspended chat will not time out if it exceeds 24 hours.
- Click Close Chat to end the conversation with the customer.
12. Click Update to save the data.
Attach and send Media
You can attach the rich media (Media, Documents, Messages, Map) and canned messages in your chat flow to encourage and engage your customers.
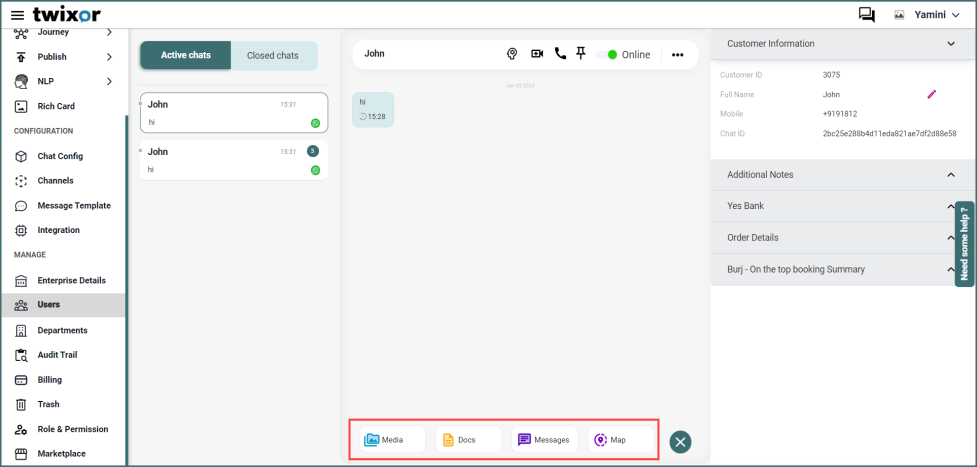
- Click
 icon to attach the Media, Docs, Messages, and Map for transforming the customer conversations into rich and interactive experiences.
 -
Info! These artifacts (Media, Documents, Messages, and Map) can be added in the Departments page. Also, Go to Manage -> users page and checks the "Allowed to save Artifacts" along with which of the artifacts to be saved under private or public mode for document, message, media etc.
- Click Browse to attach the documents and media files from your local device. The file open dialogue box appears. Select the relevant file and click Open.
- You can preset the group of messages called Canned Messages to send it to the customers. So you don't need to retype the same message again. Click
 to send the canned message.
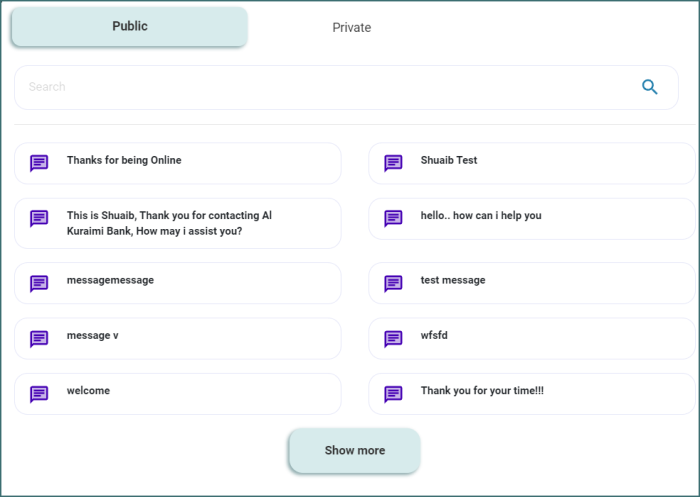
Info! You can add these private and public canned messages in the Adding Artifacts page. By Default, all artifacts will be displayed under Public tab.
You can also view chat reports, monitor chats, observe chat history, and set up the chat widget respectively from the topics Analytics, Monitor, Chat History, and Chat Config.
Refer ManageDepartmentsguide to add the rich media artifacts and canned messages that will be attached and sent to the customers.
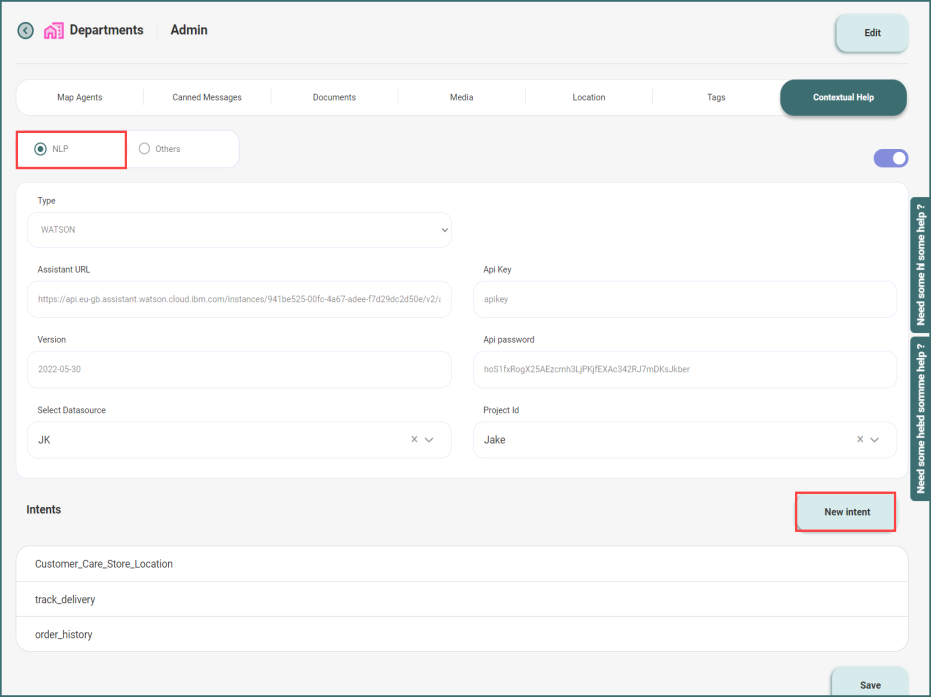
NLP based Agent assist
To configure NLP based agent assist chat, navigate to
Under Manage -> Departments -> Admin (your department) -> Contextual Help
- Choose NLP radio button
- Select the agent type.
- Provide Assistant URL, API key, Version, API Password
- Choose the Datasource and Project ID which you have created in Twixor Compute.
- Then, click New Intentbutton to create a new intent
- Enter the Intent name
- Select the workflow ID and Process ID from the drop-down menu which you have created the process in Twixor Compute.
- Click Add.
So, when your clients enter the same intent name in a live agent conversation after you establish an intent, Twixor compute will run the created process and display the image in Agent Assistant.
While chatting with a live agent, a red colored dot visible on the Twixor chat interface page when a user types the intent name that you have configured in the department page.
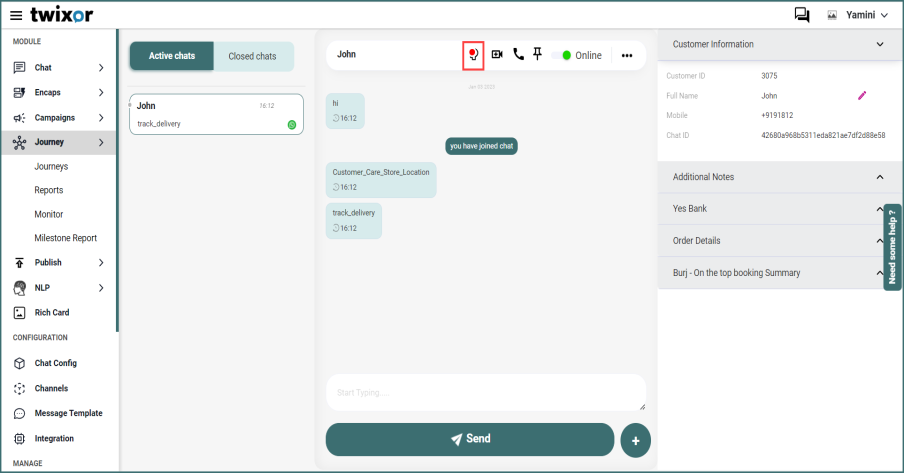
Agents can able to view this, by clicking  bot icon in the chat interface page.
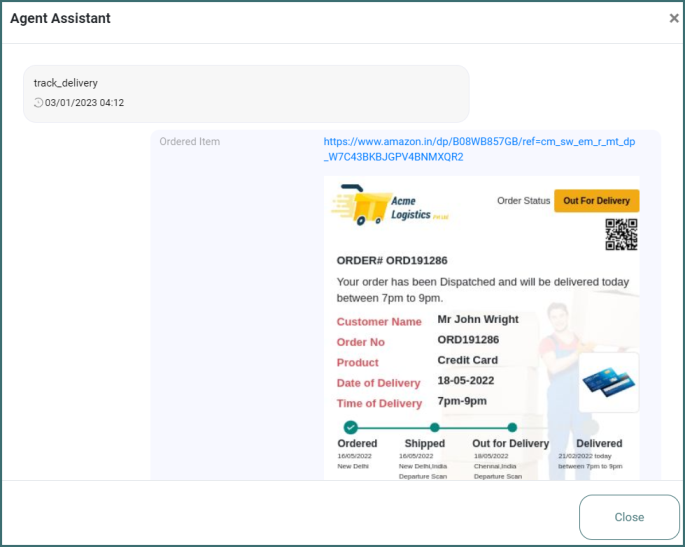
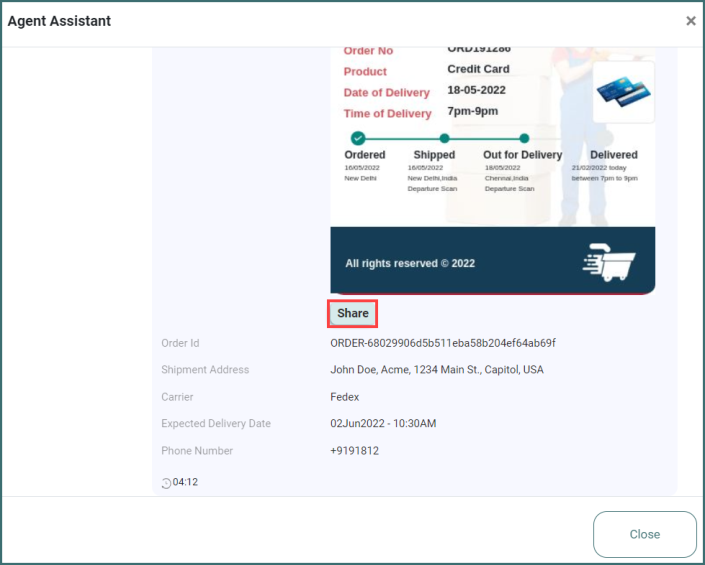
You can share the respective image to a client by clicking share button.
View Closed Chats
If you want to access any previous chats that the agent may have had with your customer, you can click on the ‘Closed Chats’ tab in Chat -> Conversation page to view this. Here, you can see the conversation history, audio/video history and user journey.
Info! Last 50 chats will be available in the closed chat list.